Oh am I loving doing these layouts! Today is a BONUS challenge over at
Die Cuttin Divas and the winner will receive some fun goodies! The challenge is to create a summer/beach inspired project. I took this opportunity to make yet another layout. We live a mere 30 minutes from the 'big lake' (Lake Michigan) and are there very often in the summertime....so I am not short on beach pictures that need scrappin! Here is my project!

I had so much fun putting this together! I was browsing through my cricut books and just kept finding more elements to add! I inked basically the entire sun to give it a nice orange glow. I embossed the clouds and waves with the D'vine Swirl folder.

I tore the paper for the sand look and embossed it with the Swiss Dots folder. I love that I found a little sail boat in my stash of stuff! I thought it went perfectly!

This was a pretty simple layout. The pictures are even printed and ready to be glued down!
I can't wait to see what you come up with this week! Make sure you submit your project at
Die Cuttin Divas for your chance to win some super fun goodies!!!
Sesame Street Friends cart - sand pail/shovel
Create a Critter cart - sun, clouds, sand castle
Designers Calendar cart - beach chair, umbrella
Plantin Schoolbook cart - waves
D'vine Swirl folder - clouds, waves
Swiss Dots folder - sand


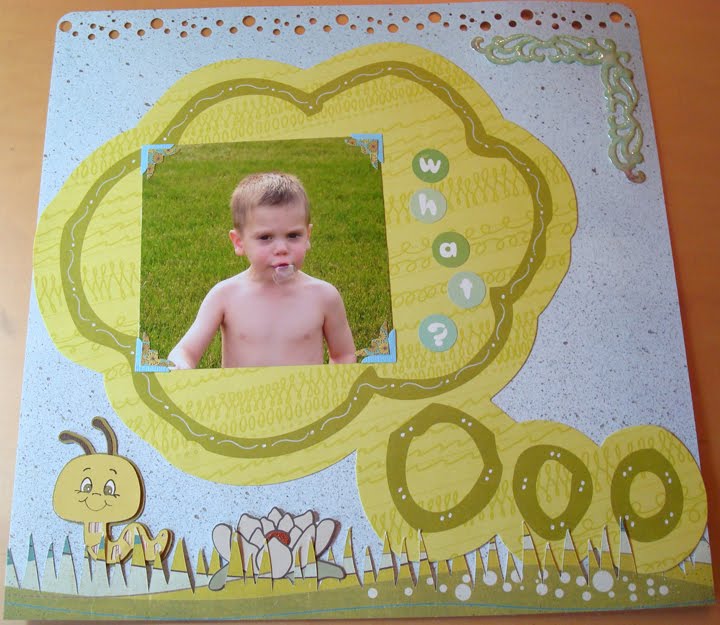 I was on vacation this past week so I felt like I was in a bit of a funk. Hopefully the picture steals the show here! I used Plantin Schoolbook for the grass and Create a Critter for the worm. I much prefer using Peachy Keen stamps for the face over the generic one on the cartridge. This particular one is from the Everyday Character Face Assortment. I also used the ek success photo corner punch to highlight the picture a bit. The flower and the corner accent at the top of the page were from my moms stash and I believe the bubble border punch is fiskars. I used glossy accents (I can't get enough of this stuff!!!) to make the corner accent pop!
 I had so much fun putting this together! I was browsing through my cricut books and just kept finding more elements to add! I inked basically the entire sun to give it a nice orange glow. I embossed the clouds and waves with the D'vine Swirl folder.
 This was a pretty simple layout. The pictures are even printed and ready to be glued down!
 I just love capturing these candid moments! All the kids got to fish and my other 2 caught their fish immediately. Then poor Lance. The fish kept tugging the line, eating the worm and swimming away! It took him hours to catch one! But he finally did and he was so proud!

 For this last card I made my own flower using a cut from Forever Young. I cut the same flower 6 times with 3 different colored paper. 3 times at 1.5 inches and 3 times at 2.25 inches.