Pages

Tuesday, June 14, 2011

Die Cuttin Divas Challenge

Happy Tuesday!! and time for this week's Die Cuttin Divas Challenge. This week's theme is 'Wedded Bliss'! However the twist is that you are to use any cuts *except* for hearts.

I had a pretty good idea of what I wanted my card to look like and the cuts I wanted to use. Take a peak :)

I think this is my new favorite card! If only I had a wedding to go to! I decided to make a tall card since I wanted the church to be pretty tall. I used Sweethearts cartridge for every single one of my cuts. I just love that cart! I decided to emboss the bride's dress with D'vine Swirl and the groom's tux with Candy Cane Stripe. The pearls in the bells are from Oriental Trading Company and I decided to give the bride some bling on her hand too! I inked the edges of the frame and outlined the edge of the entire card with stickles to give it a little something extra. The ribbon is from Celebrate It.

Friday, June 10, 2011

Vintage Father's Day!

I really had to step out of my comfort zone for this one. For some reason vintage is really hard for me. I'm not sure why though! I love to challenge myself and thrive on challenges that do just that. So I decided to participate in the following:

Getting Cricky Simply Sundays "Vintage Appeal"
More than Favors Wacky Wednesday #40 Manly project
Whimsical Wednesday Happy Father's Day Challenge #10

Here is what I created!


I'm still not sure it's totally 'vintage' but I really like how it turned out. This was another one of those cards where I had no idea what the end product was going to look like. I just took out anything from my stash that looked guyish and vintage, and then just started moving stuff around and gluing it in place. I think it actually looks better in person...for some reason my camera flash just adds to much glare in the picture.

Gypsy Wanderings cartridge - card shape and frame
EK Success - corner punch
Creative Imaginations - 'day' stickers
K&Company - 'happy' rub ons (old school I know!!)
Eyelet Outlet - pearl brad

Beach Day

Oh am I loving doing these layouts! Today is a BONUS challenge over at Die Cuttin Divas and the winner will receive some fun goodies! The challenge is to create a summer/beach inspired project. I took this opportunity to make yet another layout. We live a mere 30 minutes from the 'big lake' (Lake Michigan) and are there very often in the summertime....so I am not short on beach pictures that need scrappin! Here is my project!

I had so much fun putting this together! I was browsing through my cricut books and just kept finding more elements to add! I inked basically the entire sun to give it a nice orange glow. I embossed the clouds and waves with the D'vine Swirl folder.


I tore the paper for the sand look and embossed it with the Swiss Dots folder. I love that I found a little sail boat in my stash of stuff! I thought it went perfectly!

This was a pretty simple layout. The pictures are even printed and ready to be glued down!

I can't wait to see what you come up with this week! Make sure you submit your project at Die Cuttin Divas for your chance to win some super fun goodies!!!

Sesame Street Friends cart - sand pail/shovel
Create a Critter cart - sun, clouds, sand castle
Designers Calendar cart - beach chair, umbrella
Plantin Schoolbook cart - waves
D'vine Swirl folder - clouds, waves
Swiss Dots folder - sand

Tuesday, June 7, 2011

Die Cuttin Divas Sketch Challenge

This week at Die Cuttin Divas we had a sketch challenge. I decided to use this opportunity to finally make a graduation card for my cousin. I've been putting it off mostly because I don't have any cartridges that have grad cuts. So I decided to make my own. Below is the sketch from DCD
and here is what I decided to make


The cap is actually a stretched diamond and square welded together. Then I cut the diamond again to layer the cap. I just rolled a piece of white paper and tied it for the diploma. I had to actually look at my own graduation pictures to remember how to construct a tassel! I just used some orange ribbon and bunched it together with a strand of gold wired Christmas ribbon! I knew it would come in handy some day! Now hopefully I got his school colors right!

George and Basic Shapes cart - cap
Blackletter cart - banner
Making Memories - 2011 stickers
Recollections - square brad

Monday, June 6, 2011

Father's Day

I was really excited to create this card! 2 years ago I made my husband a t-shirt with this sentiment on it (and the kids footprints) and it turned out adorable! He still wears it! So that is what gave me the inspiration for the card. I decided to enter it into 2 challenges both which were to create a Father's Day project. Simon Says Stamp and Fantabulous Cricut Challenge me Monday #63.


Here is what I printed out for the inside :)

I decided to go with a shaped card even though I still feel limited with my personal cutter (needing to upgrade!!). I like the look of the shaped card though, but it is smaller than I would have liked. This is totally a style and color shirt my husband would wear! I added 3 brads to the front since I did not have small enough buttons and cut the footprints 3 different sizes for my 3 kids.

I am also linking this project to Patches of Pink link up party!

My Community cart - feet
Sports Mania cart - shirt and layers/shadow
Computer Generated Sentiment

Sunday, June 5, 2011

Peachy Keen Sketch Challenge #53

My project today was inspired by a wonderful local business called Noodles and Company. Our local facility generously donated a mac and cheese lunch to the classroom at our elementary school that collected the most Box Tops for Education this year! I am the head of that fund raising committee and I counted, cut and submitted every last box top that was turned in. Fancy enough, my kindergartner's class collected the most! So last week my co chair and I brought in mac and cheese for 24 kindergartners! They LOVED it! Most of them had 2nd and 3rd helpings! The woman at Noodles and Company is such a fantastic lady. She was willing to do basically anything to support the school. What a neat experience for everyone! SOOO I wanted to send her something to thank her for her generosity. I decided to make a card for the Peachy Keen Sketch Challenge #53 with a twist, where the twist was to use a sponging technique. I've been learning how to ink the edges of my papers but I wanted to try something a little different. Here is the Peachy Keen Sketch:
and here is the card I created:


I immediately thought of the bowl and noodles image from Create a Critter when I decided to make this card! I mean how perfect! I sponged the edges of all of the papers but I also cut out the sentiment Thank You and sponged through the shadow onto my background sheet. I think it turned out pretty neat! I finished the sketch by using Glossy Accents and some Martha Stewart glitter! I really like the look of this card! I cannot wait to bring it into Noodles and Company!

Create a Critter cart - noodles, bowl, chopsticks
Gypsy Wanderings cart - thank you sentiment
Technique Tuesday - yellow ink
Rubber Stampede - black ink

Saturday, June 4, 2011

Easter Layout

Again I'm going WAY back! I found this cute sketch through Sassy Lil' Sketches and paired it with the challenge over at My Craft Spot which was to use a cute critter in my project. and I immediately thought of Easter and the Easter bunny! I'm trying to keep my pages in order so I was actually up to Easter of *blush* 2007 ! Hey I really am making progress! Below is the sketch from Sassy Lil' Sketches.

and here is what I did:

I'm really happy with this layout! It was actually pretty simple. The paper did most of the work! I welded 4 Easter eggs together with my gypsy and hid most of the features. Then just made my own shadow on white paper. I LOVE the egg paper. I really wanted to find a sheet that had a gradual color change and I'm SO glad I came across this one! (unfortunately I have no idea who manufactured it). I added some buttons and bakers twine to finish it off.

Designers Calendar - Easter eggs/shadow
Create a Critter - bunny
Gypsy Font - Easter title
Oriental Trading Company - buttons
OMG Chocolate Frog - bakers twine
ek success scallop diamond punch
Recollections - glitter 'Easter' paper

Tuesday, May 31, 2011

My itsy bitsy Spiderman!

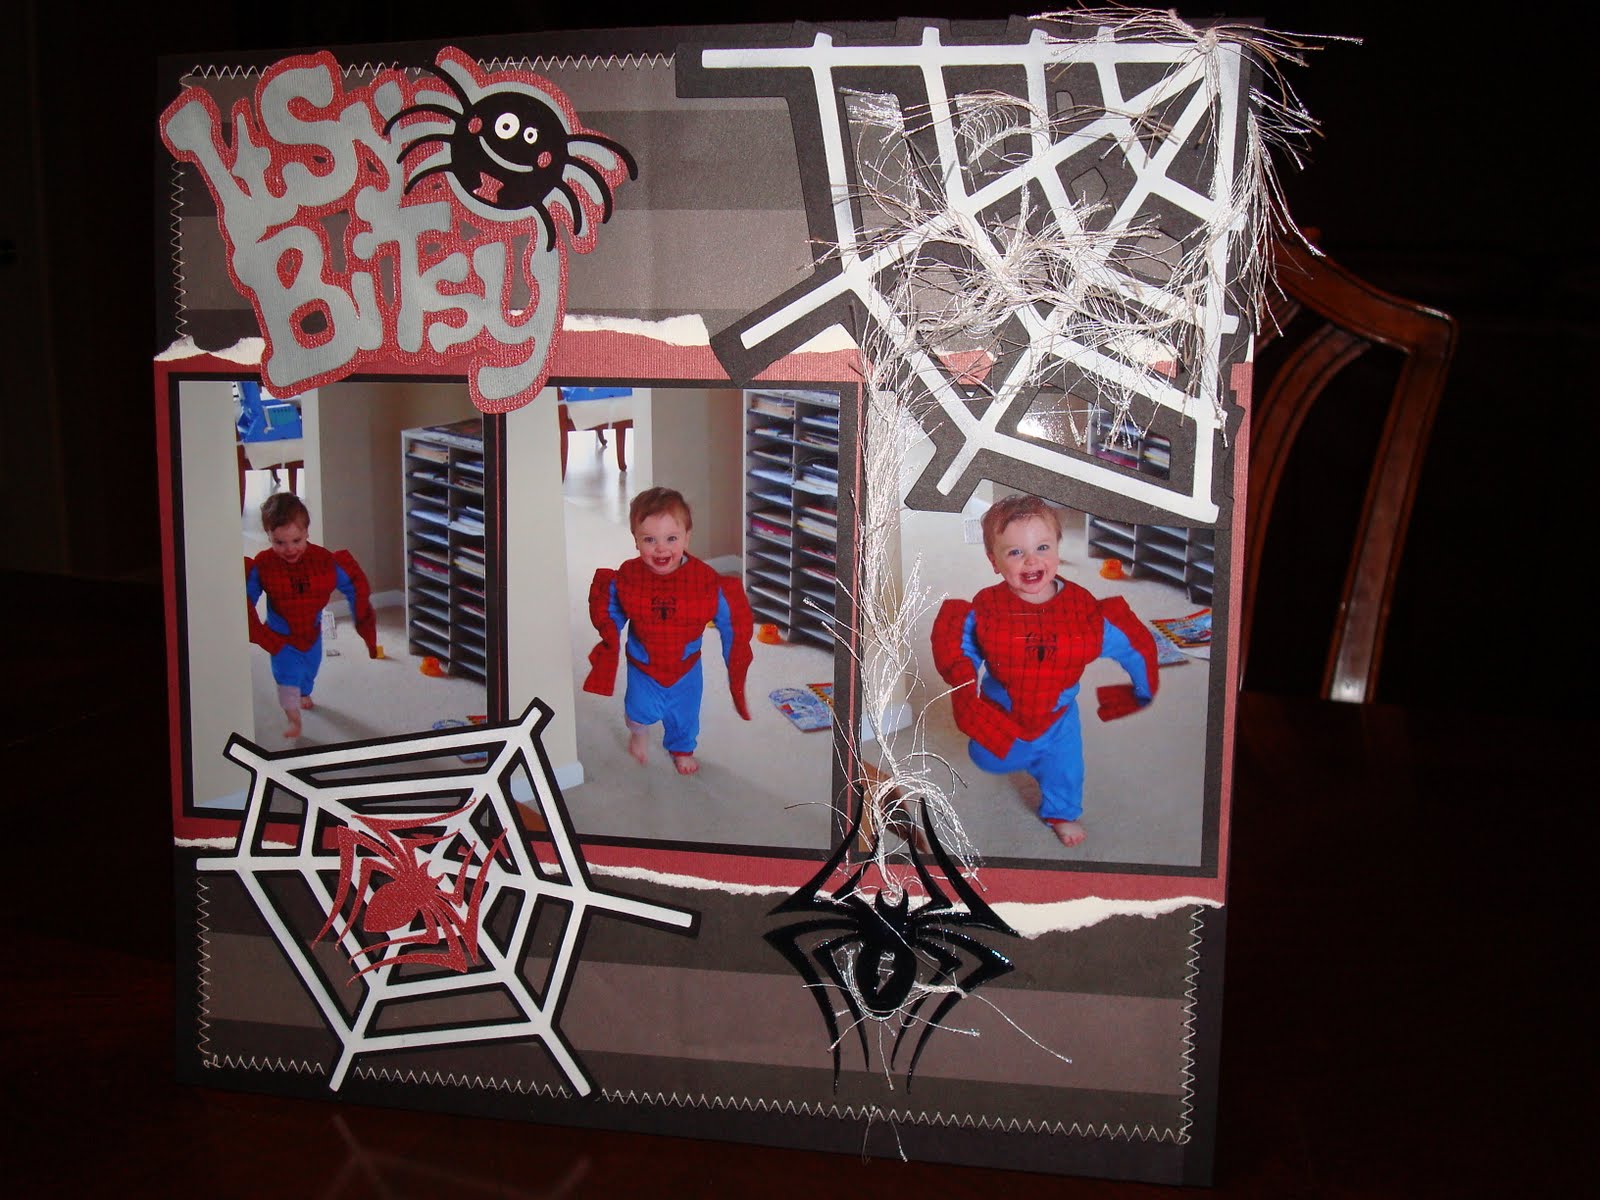
Hello and welcome to Die Cuttin Divas Creepy Crawly Challenge #17. I had an absolute blast putting together this layout! It really brought me back to when my kids were teeny tiny. This was back in February 2008. My little guy insisted on wearing a Spiderman costume and running circles around my living room. It's not in this layout but my then 3 year old was doing the same thing. How could I resist snapping tons of action pictures!


I just love how this turned out! I kept finding fun things to add on to it...without overdoing it. And then when I found the 'Itsy Bitsy' sentiment I just fell in love! I pulled out my sewing machine again! It's not perfect but I think it adds a neat perspective to the layout! I also added glossy accents to the black spider to make him shine and stand out a bit! I inked the edges of the paper, spider web, and sentiment. The thread is just from my stash.

Mini Monsters cart - sentiment, webs
Indie Art cart - spiders
Rubber Stampede - ink

Sunday, May 29, 2011

Fun layout

Recently I found Sassy Lil' Sketches, a great challenge site for layout and card sketches! I decided to combine their May 21st Sketch Challenge with the More Than Favors Wacky Wednesday #39 Color Challenge - to use the colors brown, teal, pink and cream.

I had been trying to knock out these layouts and while looking through my paper stash I came across this beautiful sheet that I just couldn't pass up. and combining it with the other required colors...oh my gosh it was so fun to work with! So this layout is way back from an Easter trip to Georgia we took with my family. There isn't too much to do in Georgia but we took advantage of the beautiful weather and spent the day at a local park! The boys of course couldn't resist finding worms. BOYS!

Below is the layout sketch from Sassy Lil' Sketches


I decided to turn the sketch.....and here is what I came up with.


It's really a simple little layout...and cricut-less! I love being able to use the object on the paper and just working around that. and I really like that although it has a fair amount of pink involved it still screams all boy!

The Girls' Paperie (paper girl) - sentiment frame and flower die cuts
Phrase Cafe - 100% Boy sticker
ek success Victorian Photo Corner
Recollections border punch
Studio G ink - inked edges of cream paper

Peachy Keen Sketch Challenge #52

What a crazy busy weekend! I'm glad I was able to find time tonight to put together a card for one of my favorite challenges....Peachy Keen Stamps! Below is the sketch for their sketch challenge #52.
And here is what I came up with.


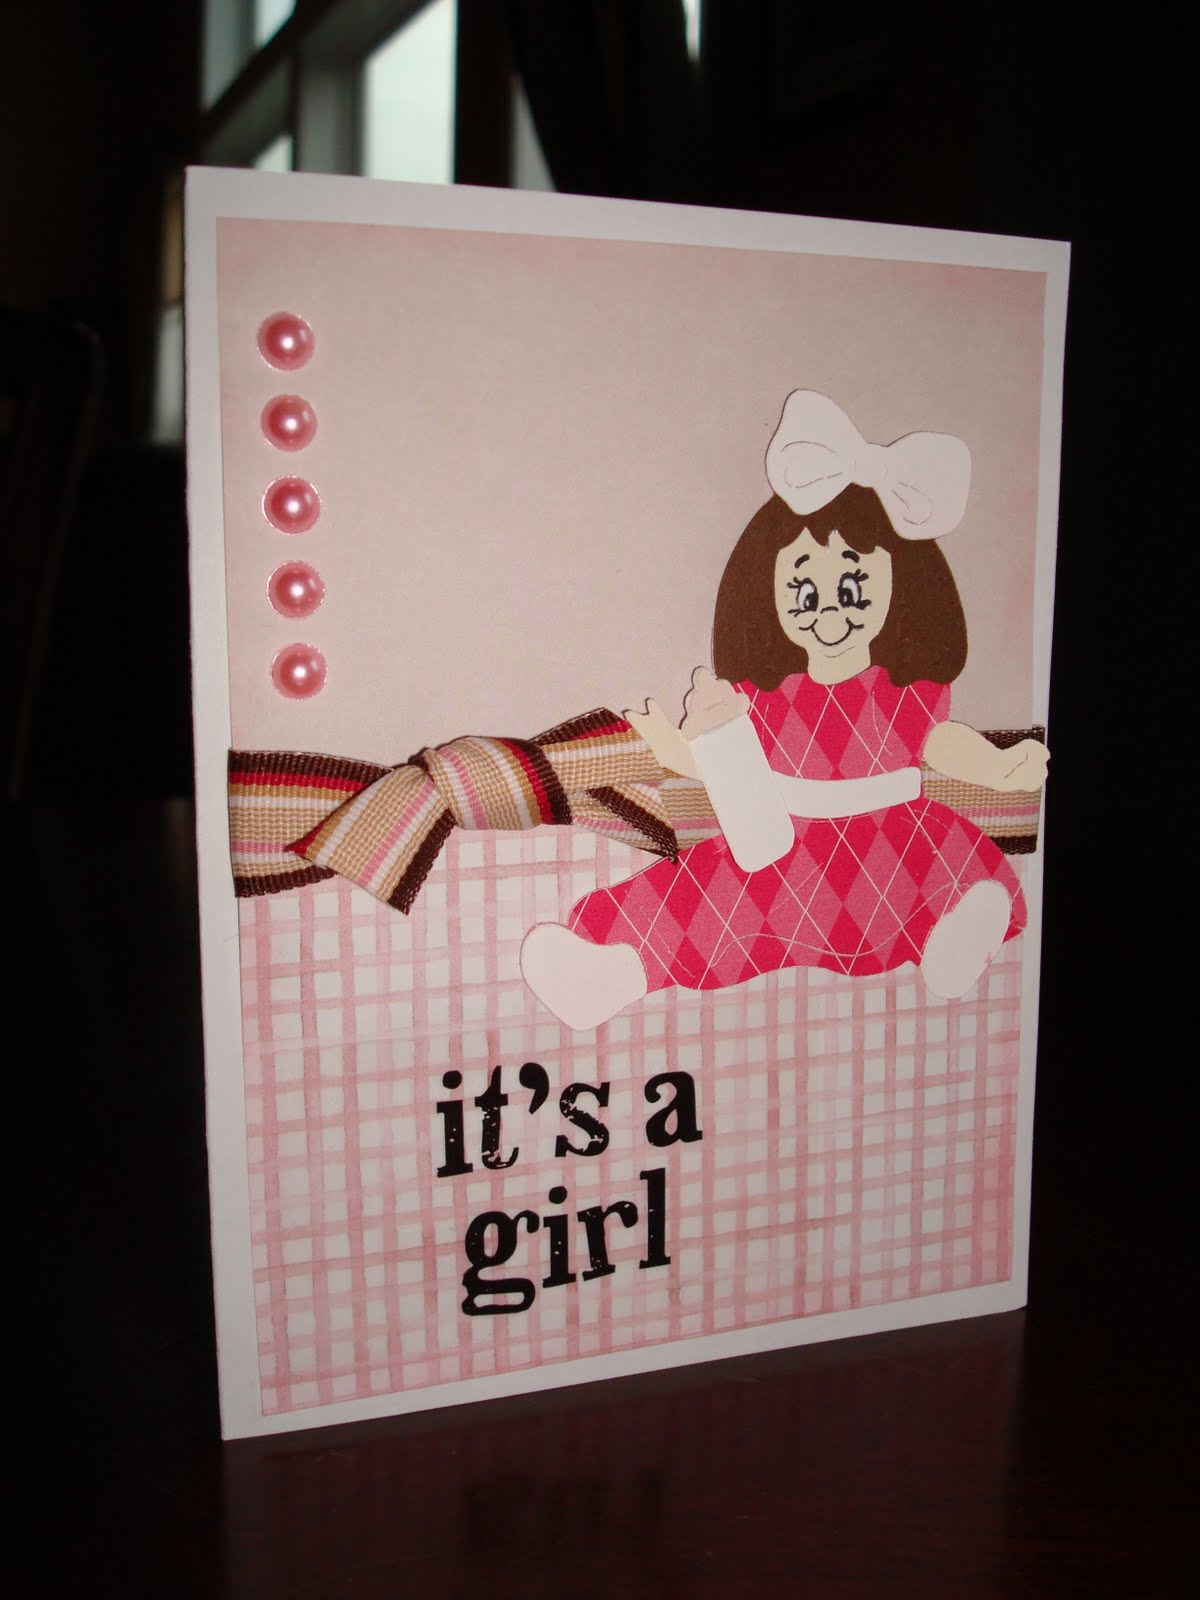
I'm really loving making these baby cards. I'm getting better at really digging through my current cartridges too. I can't believe I found this little doll on the Christmas cartridge! I'm proud of myself for even opening that cartridge in.....May! I think she's adorable! I inked all of the edges, added some ribbon and the 'it's a girl' sticker from my stash.

Christmas cart - doll
Gypsy Wanderings cart - bottle
Oriental Trading Company - pearls
Peachy Keen Stamps Everyday Character Faces
Rubber Stampede, Tuesday Technique - inks